Sunday, March 1, 2015
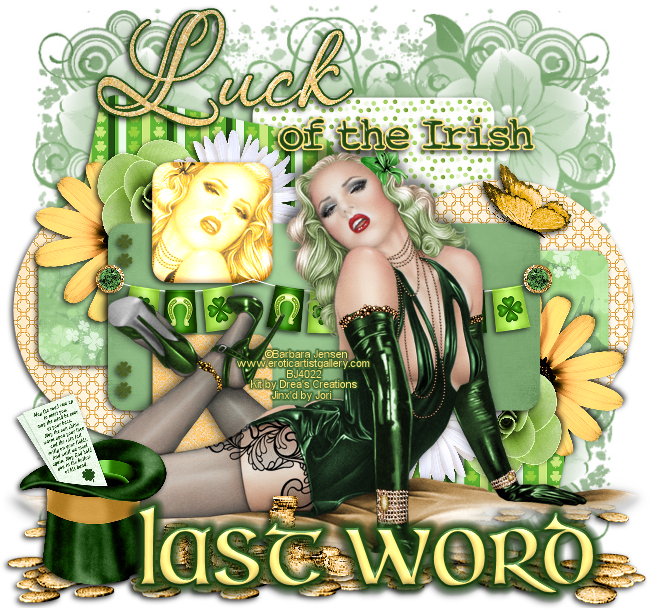
PTU Tutorial ~ Feelin' Irish + Free Snags!

This tutorial is my own creation, from my own imagination. Any similarities are completely coincidental!
This tutorial was written using PSP9, but should easily be completed in other versions.
Supplies:
Kit: I'm using the awesome new kit, "Feelin' Irish" by Drea's Creations. You can pick up this gorgeous kit at any of her stores: Heart Beatz Creationz, Pimpin' PSPers Warehouse or Tiny Turtle Designs.
Tube: I'm using the beautiful artwork of Barbara Jensen. You can find this tube HERE.
Template: I'm using a template from Millie's PSP Madness. You can find it HERE. Be sure to leave her some love!
Mask: I'm using Trese Mask0007 from Trese. You can find all of her amazing masks HERE.
Font: Irish Unicalfabeta can be found HERE.
Plugin: Eye Candy 4000 Glass & Gradient Glow
Ready? Let's get started!!
Open the template.
Shift + D to duplicate it and close out the original. Delete the copyright layer.
Close out the word art layers (click the little eye next to
the layers in the layer palette) so you can build the tag without the word art
getting in your way!
Now, the forum I hang out in the most has a tag size limit of 650x650, so I went ahead and resized the template 86%
and then went to Image > Canvas size > 650 x 650.
For each of the layers in the template, you will need to go
Selections > Select All > Float > Defloat and then paste your chosen
papers as a new layer. Selections >
Invert > Delete. Delete the original
template layer after pasting your kit paper to keep from having odd outlines!
Layer 10 . . . . . DC_Paper
12
Layer 9 . . . . . DC_Paper12
Layer 8 . . . . . DC_Paper15
Layer 7 . . . . . DC_Paper23
Layer 6 . . . . . DC_Paper23
Layer 5 . . . . . DC_Paper16
Layer 4 . . . . . DC_Paper16
Layer 3 . . . . . DC_Paper11
Layer 2 . . . . . DC_Paper11
Layer 1 . . . . . DC_Paper
5
Select the top small square (previously layer 9). Selections > Select All > Float >
Defloat. Paste your tube as a new layer
and move the tube to where the face is lined up with the marching ants. Selections > Invert > DELETE.
Adjust the blend mode to something you like. I used Luminance (Legacy). Merge down with the square. Apply an Inner Bevel with these settings:

From the kit, copy DC_91and paste as a new layer on your
canvas. Resize 30%. Move this layer under the top long rectangle
layer.
From the kit, copy DC_92and paste as a new layer on your
canvas. Resize 20%.
From the kit, copy DC_89and paste as a new layer on your
canvas. Resize 25%.
Add a drop shadow to each flower. Merge the three flowers down to one
layer. Duplicate. Image > Mirror. Image > Flip.
From the kit, copy DC_3and paste as a new layer on your
canvas. Resize 30%
From the kit, copy DC_18and paste as a new layer on your
canvas. Resize 90%
Duplicate. Image >
Mirror.
From the kit, copy DC_17and paste as a new layer on your
canvas. Resize 30%
From the kit, copy DC_97and paste as a new layer on your
canvas. Resize 15%
From the kit, copy DC_52and paste as a new layer on your
canvas. Resize 55%
Move this layer behind your tube so it is stretch across the
rectangle of the template.
From the kit, copy DC_10and paste as a new layer on your
canvas. Resize 15%
Move this layer to the end of the flag banner to act as a
pin. Duplicate. Image > Mirror
For the Word Art…
With “Luck”:
Selections > Select All > Float > Defloat.
From the kit, copy DC_Paper12 and paste as a new layer. Selections > Invert > Delete. Selections > Select None. Delete the original “Luck” layer.
Apply Inner Bevel with the following settings:
Selections > Select All > Float > Defloat. Modify > Expand > 2.
Add a new raster layer and move it under “Luck.” Floodfill with #224d17.
Selections > Select None.
Select the top “Luck” layer and merge down. Apply a drop shadow of your choice.
For the other Word Art:
Selections > Select All > Float > Defloat
Floodfill with #224d17.
Selections > Select None.
Apply the same Eye Candy 4000: Glass settings as previously.
Selections > Select All > Float > Defloat. Selections > Modify > Expand > 2.
Add a new raster layer and move it under the “of the Irish”
layer. Floodfill with #ffe47d.
Merge the two “of the Irish” layers down and apply a drop
shadow of your choice.
Add your copyright information.
For the font, I used font size of 72, stroke width of 2.
FG: #224d17
BG: #ffe47d
Apply Inner Bevel with these settings:

Apply Eye Candy 4000: Gradient Glow with these settings:


Apply a drop shadow of your choice.
Layers > Merge > Merge Visible. Save as a PNG and you're done!
Now for those snags!!


Friday, February 27, 2015
PTU Tutorial ~ Cherry Bomb + Freebie Snags!

**This tutorial is my own creation, from my own imagination. Any similarities are completely coincidental!**
This tutorial was written in PSP9, but should easily transfer to other versions!
Supplies:
Kit: I'm using the super fun, retro kit "Cherry Bomb" by Pink Paradox Productions. You can pick up this awesome kit from her store, HERE.
Tube: I'm using the beautiful tube "Mysterious Lady" by Roman Zaric. This is a Pay To Use tube and you must have a license to use his artwork. You can find his amazing work HERE.
Mask: I'm using Rocked by Rachel's mask Mask_Set14_1. You can find this mask at her blog HERE.
Font: I'm using the font Riesling, which can be found HERE.
Plugins: Eye Candy 6 : Gradient Glow (optional for text)
Ready? Let's get started!
Be sure to add a drop shadow of your choice to your elements. I'm using 2, -2, 78, 7.98, color Black.
Open a new canvas 650x650 with a transparent background.
From the kit, copy Cherry Bomb (74) and paste as a new layer
on your canvas. Resize 80%
Using your Magic Wand, click outside of the heart.
Selections > Modify > Expand > 5
From the kit, copy Cherry Bomb Paper (7) and paste as a new layer on your canvas.
Move this layer under the heart.
DELETE.
Selections > Select None
From the kit, copy Cherry Bomb (94) and paste as a new layer
on your canvas. Resize 65%.
From the kit, copy Cherry Bomb (54) and paste as a new layer
on your canvas. Resize 45%.
From the kit, copy Cherry Bomb (53) and paste as a new layer
on your canvas. Resize 40%.
From the kit, copy Cherry Bomb (56) and paste as a new layer
on your canvas. Resize 40%.
From the kit, copy Cherry Bomb (55) and paste as a new layer
on your canvas. Resize 55%.
From the kit, copy Cherry Bomb (20) and paste as a new layer
on your canvas. Resize 35%.
From the kit, copy Cherry Bomb (69) and paste as a new layer
on your canvas. Resize 35%.
From the kit, copy Cherry Bomb (59) and paste as a new layer
on your canvas. Resize 30%.
From the kit, copy Cherry Bomb (9) and paste as a new layer
on your canvas. Resize 25%.
From the kit, copy Cherry Bomb (16) and paste as a new layer
on your canvas. Resize 20%.
From the kit, copy Cherry Bomb Paper (1) and paste as a new layer on your canvas.
Apply your mask.
Layers > Merge > Merge Group.
For the font, I used a #ae0c0c for the BG and FG is null, font size 72, stroke width of 0.
I then applied Eye Candy 6: Gradient Glow with these settings:

Apply a drop shadow to your font (and your elements if you haven't done it so far).
Add your proper copyright.
Layers > Merge > Merge Visible.
Save as a PNG and you're done!
Now for those snags!!


Monday, February 23, 2015
PTU Tutorial ~ Cindi's Lilac Dream + Free Snags!

**This tutorial is my own creation, from my own imagination. Any similarities are completely coincidental!**
This tutorial was written in PSP9, but should easily translate for other versions.
Supplies:
Kit: I'm using the beautiful kit "Cindi's Lilac Dream" by Jackie's Jewels. You can pick up this amazing kit of 84 Elements and 13 papers from Jackie's store Pimpin' PSPers Warehouse.
Tube: I'm using the tube "Paris" by Alex Prihodko that can be purchased from PFD HERE. You need a license to use this tube.
Masks: I'm using two different masks for this tag. MPM_Mask06 by Millie, which you can find HERE and RR_MaskSet6_2 by Rachel, which you can find HERE.
Plugins: These are optional for the font only:
Eye Candy 4000: HSB Noise
Eye Candy 4000: HSB Noise
Eye Candy 4000: Gradient Glow
Font: I'm using the font "A Gentle Touch" which you can find HERE.
Ready? Let's get started!
Remember to add a drop shadow to your elements along the way! I used 2, -2, 80, 7.98, color Black!
Open a new canvas, 650x650, transparent background.
From the kit, copy JJS_71 and paste as a new layer on your canvas.
From the kit, copy JJS_65 and paste as a new layer on your
canvas. Resize 75%
Move to the left side of your canvas.
Duplicate
Image > Mirror
From the kit, copy JJS_68 and paste as a new layer.
From the kit, copy JJS_60 and paste as a new layer on your
canvas. Resize 65%
From the kit, copy JJS_63 and paste as a new layer on your
canvas. Resize 40%
From the kit, copy JJS_8 and paste as a new layer on your
canvas. Resize 30%
From the kit, copy JJS_72 and paste as a new layer on your
canvas. Resize 50%
Move to the left side of your canvas.
Duplicate
Image > Mirror
From the kit, copy JJS_71 and paste as a new layer on your
canvas. Resize 45%
Move to the left side of the canvas, in front of the fence.
Duplicate
Image > Mirror
From the kit, copy JJS_79 and paste as a new layer on your
canvas. Resize 30%
From the kit, copy JJS_16 and paste as a new layer on your
canvas. Resize 60%
From the kit, copy JJS_46 and paste as a new layer on your
canvas. Resize 45%
From the kit, copy JJS_78 and paste as a new layer on your
canvas. Resize 30%
From the kit, copy JJS_28 and paste as a new layer on your
canvas. Resize 40%
From the kit, copy JJS_69 and paste as a new layer on your
canvas. Resize 40%
Duplicate
Resize 85%
From the kit, copy JJS_62 and paste as a new layer on your
canvas. Resize 30%
From the kit, copy JJS_15 and paste as a new layer on your
canvas. Resize 55%
Open PPJJS9. Shift + D to duplicate it. Close out the original. Resize the duplicate 72%. Copy and paste as a new layer. Layers > Arrange > Send to Bottom.
Apply MPM_Mask06.
Open PPJJS13. Shift + D to duplicate it. Close out the original. Resize the duplicate 81%. Capy and paste as a new layer. Layers > Arrange > Send to Bottom.
Apply RR_MaskSet_6_2.
For the name, I used the "A Gentle Touch" font at size 72, stroke width of 0.
FG: #d0c3d9
BG: #8f8498
(The FG is for the Gradient Glow)
Type your name and apply the following Inner Bevel:

In Eye Candy 4000, apply HSB Noise with these settings:

Now apply Eye Candy 4000: Gradient Glow with these settings:


Apply your desired drop shadow.
Add your copyright information.
Layers > Merge > Merge Visible.
Save as a PNG and you're done!
Now on to those snags!!


Sunday, February 15, 2015
PTU Tutorial ~ Broken Inside + Free Snags!!

**This tutorial is my own creation, from my own imagination. Any similarities are completely coincidental!**
This tutorial was written in PSP9, but should easily convert to other versions!
Supplies:
Kit: I'm using the gorgeous kit "Broken Inside" by Drea's Creations. You can pick up this amazing kit of 143 elements and 26 papers at any of Drea's stores: Heart Beatz Creationz, Pimpin' PSPers Warehouse or Tiny Turtle Designs for the amazing price of only $1.00!
Tube: I'm using the amazing artwork ©Ismael Rac, called Bad Kitty. You can find this tube in his store HERE. Please do not use his work without the proper license!
Masks: I used some masks from Millie's PSP Madness. I used MPM_Mask 87, which you can find HERE and MPM_Mask 98, which you can find HERE.
Font: I used the font Burton's Dreams, which you can find HERE.
Plugins: Eye Candy 4000 Glass & Gradient Glow.
Ready? Let's go!
Open a new canvas, 650x650, transparent background.
From the kit, copy DC_143 and paste as a new layer. Resize 55%.
Using your magic wand, click inside of each frame.
From the kit, copy DC_Paper1 and paste as a new layer.
Selections > Invert
DELETE
Apply a drop shadow of your choice to the frame. I used 2, -2, 80, 8.00.
From the kit, copy DC_91 and paste as a new layer. Resize 55%.
Apply a drop shadow of your choice.
From the kit, copy DC_85 and paste as a new layer. Resize 45%.
Apply a drop shadow of your choice.
Image > Rotate > Left > 10
From the kit, copy DC_59 and paste as a new layer. Resize 35%.
Apply a drop shadow of your choice.
From the kit, copy DC_102 and paste as a new layer. Resize 80%.
Apply a drop shadow of your choice.
From the kit, copy DC_79 and paste as a new layer. Resize 50%.
Apply a drop shadow of your choice.
Duplicate
Image > Mirror
From the kit, copy DC_70 and paste as a new layer. Resize 25%.
Apply a drop shadow of your choice.
Adjust > Sharpeness > Sharpen
Duplicate
From the kit, copy DC_43 and paste as a new layer. Resize 40%.
Apply a drop shadow of your choice.
From the kit, copy DC_52 and paste as a new layer. Resize 35%.
Apply a drop shadow of your choice.
From the kit, copy DC_46 and paste as a new layer. Resize 40%.
Apply a drop shadow of your choice.
From the kit, copy DC_63 and paste as a new layer. Resize 70%.
Apply a drop shadow of your choice.
From the kit, copy DC_24 and paste as a new layer. Resize 20%.
Apply a drop shadow of your choice.
Duplicate. Re-size 80%. Apply a drop shadow of your choice.
Duplicate again and re-size 80%.
From the kit, copy DC_6 and paste as a new layer. Resize 20%.
Apply a drop shadow of your choice.
Paste From the kit, copy DC_Paper 18 as a new layer and
apply MPM_Mask 87.
Paste From the kit, copy DC_Paper 21 as a new layer and
apply MPM_Mask 98.
For the font, I used these settings:
With FG: #bc96e8
BG: #2b0557
Convert to a Raster Layer.
Selections > Select All > Float > Defloat
Selects > Modify > Contract > 1
Apply Eye Candy 4000 Glass with these settings:

Now, from the kit, open DC_83 and Shift + D to duplicate it. Re-Size 50%. Copy and paste as a new layer. Move this over your font, like so:

You don't want it to completely cover the font, just a little bit!
Selections > Invert.
Delete.
Selections > Select None
Layers > Merge > Merge Down
Apply Eye Candy 4000 Gradient Glow with these settings:


Apply a drop shadow of your choice. For the font, I used 2, -2, 80, 4.00, color Black.
Layers > Merge > Merge Visible.
Save as a PNG and you're done!
Now for those snags! :)


Subscribe to:
Posts
(Atom)